Showers and Tubs:
Generally the most significant (and expensive) consideration in accessibility related bathroom remodeling involves showering/bathing accommodations. While some users insist on retaining a bathtub, the majority opt for tub to shower conversions for practical and financial reasons. For shower decisions related to accessibility, we return to the question of how the user will enter the shower.
Will the user be entering the shower in a wheelchair? (as opposed to transferring to a shower chair or bench.)
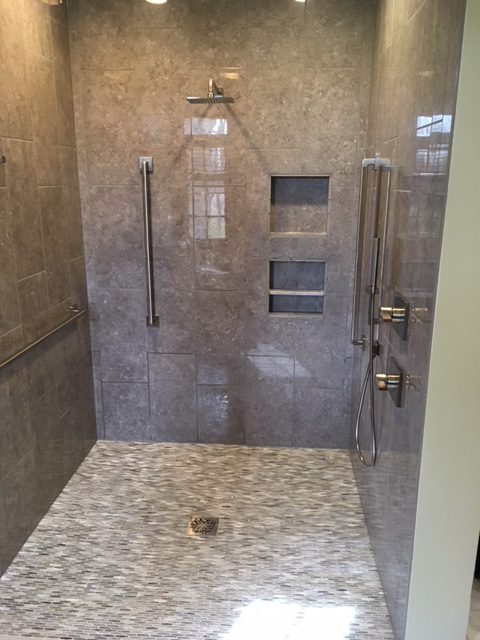
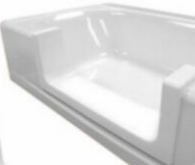
(YES): If the answer is “yes”, then a roll-in shower is greatly preferred; that is, a shower with no threshold. When a wheelchair is used in a shower, both the elimination of an entry threshold and the size of the shower become important considerations. Shower thresholds are in place to contain water, so their elimination naturally raises the question as to how water will be retained in the shower, and this is perhaps the greatest challenge to zero-threshold showers. Generally, this is accomplished through one of two ways (or a combination of both): floor slope and size and a collapsible water dam. The water dam, shown below on the Best-Bath shower, is a flexible rubber piece that attaches to the shower base surface and can be stepped on or rolled over. When used in combination with a carefully placed heavy duty shower liner, it can be effective in retaining water.
Both methods of water containment rely on a carefully constructed slope toward the drain. Slopes that become too steep are a safety threat to shower users while slopes too gradual may not allow water to drain properly which is a serious problem in a zero threshold shower. Proper drainage and usability means that overall shower size is very important in zero threshold showers. Generally speaking, it would be best if this shower is at least 60” wide and 36” deep (front to back). If leg extensions are used on the wheelchair, the 60” width is absolutely necessary – and even more width is desirable, even if just several more inches for clearance.
(See roll-in shower photos below) – Best bath shower/ tile shower
If the wheelchair user is not entering the shower in a wheelchair then presumably the s/he will be transferring to some sort of shower bench or chair; or even in rare cases, standing in the shower. In this event, an important follow-up question in this situation is:
“Is the user able to negotiate a 4” threshold easily and safely.” (This means, can the user can safely step or lift legs over a 4” threshold)
(YES): If so, a zero threshold shower is probably not required, and this can be beneficial from the standpoint of cost, product availability and water containment in the shower area.
(NO): If the user can’t safely lift legs over a 4” threshold then either the roll-in type shower described above will be required without some ongoing form of assistance.
Roll-in shower-custom tile Roll-in shower- (Best-Bath)
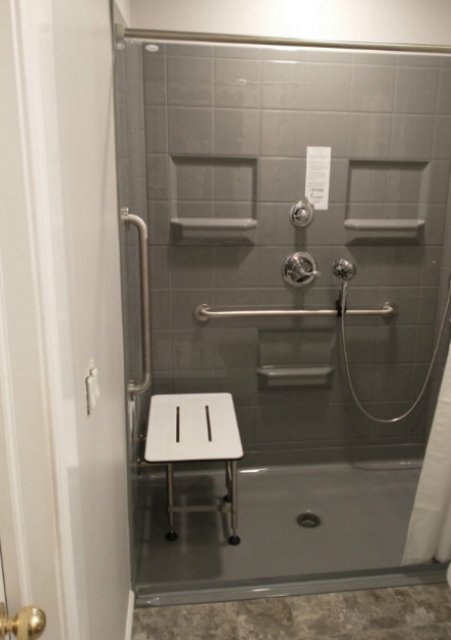
While a 60”x36” shower size is desirable in many cases, if the user is highly independent, a 48” shower may be fine, but the 36” depth – or at the least 34”, should be maintained for the user’s comfort and to help ensure water containment. Water containment remains an issue even with curbed (showers with thresholds) since generally shower doors are discouraged in accessibility remodeling due to the fact that limiting access to the shower, forcing entry through a tighter space is not encouraged for those with any sort of mobility challenge. This means that water containment will rely on a shower liner/curtain system, so a high quality, weighted shower liner is highly recommended.
While roll-in or step in showers are attractive (and effective) replacements to bathtubs, a significantly less expensive option is the tub-cut away. A tub cut kit (photo below), effectively converts the current tub to a shower with a step in height of about 7″ (depending on original tub height). The finished step is durable with a slip resistant finish for a nice transition from the bathroom floor to tub floor. This option, especially when combined with a well placed grab bar, can be quite helpful to those with mobility challenges and usually installed for less than $1,000. It is important to note that this is a permanent conversion and that the bathtub cannot be used as a tub again.
Toilets and Grab bars
Generally toilet height, location and assistance with mount/dismount are the most critical considerations in accessibility remodeling. A taller (“comfort height”) toilet is usually around 16 ½” and up. This measurement is from the floor to the height of the bowl and does not include the seat which (usually) adds another inch or so. This seat height of 17 ½” (from floor to top of the seat) is generally tall enough for most users, but not for everyone.
Shorter users – children or adults closer to 5’ in height may find that the 17 ½” height is actually too high and would prefer the standard height toilet – usually in the 14 ½” range (15 ½” with the seat). At the other end of the spectrum, those who have extreme difficulty bending knees or have significant balance issues may prefer even higher toilets.
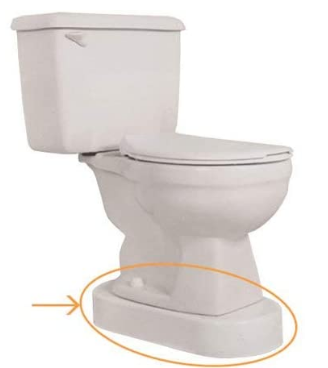
One of the safest ways to achieve this is with a product that sits under the toilet for elevation adding another 4”, achieving a seat height between 21” and 22”. We have used a product known as the “Toilevator” in these situations. We have found them to be well designed and much more solid than the less expensive 4” plastic toilet seats which can become quite unstable (and thus dangerous for users) over time.
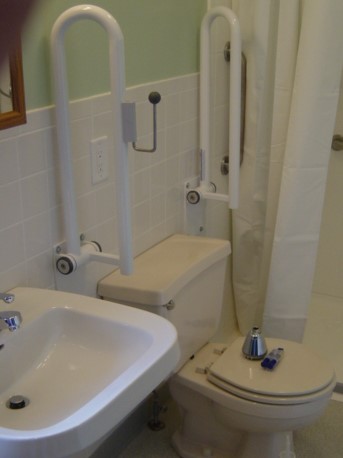
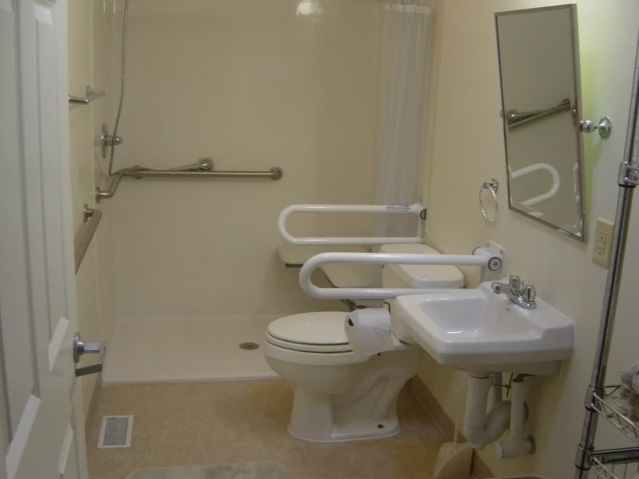
Grab bars are an important consideration in toileting. Generally the most helpful grab bars are along the side of a toilet when wall space permits and occasionally across from the toilet when a wall facing the toilet is within reach. Grab bar angle and placement will depend on individual user needs.
When no wall is available along the side and the front is not an option, flip up or floor to wall mount grab bars may be an alternative solution, though each has drawbacks. The flip up grab bar is beneficial because when the grab bar is not wanted, it can be folded up and out of the way. The challenge comes in the installation. These grab bars must be mounted to solid blocking or even a plate mounted to wall studs. The most common installation method involves removing drywall from either from the bathroom side of the wall (which almost always means taking the toilet out first – and then reinstallation later), or removing drywall from the other side of the bathroom wall (often a closet, another room etc.) In either case, the removal of drywall for blocking installation requires drywall repair. The flip up bars are usually significantly more expensive than standard grab bars and require the additional time in installing blocking, and wall repair. If space is very tight, sometimes there simply isn’t room for a flip up grab bar, but when installed, this can be a very effective solution.
Flip-up Grab bars (up position) Flip-up Grab bars (down position)
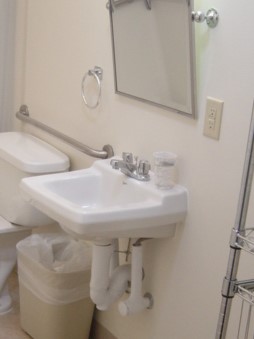
Lavatories (Sinks) and Vanity Cabinets
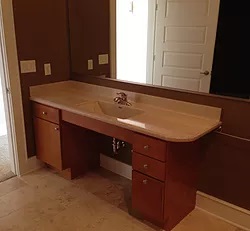
Bathroom sinks are another area that can be highly customized, but for our purposes here, we’ll mention the standard and then two common adaptations. Once again, primary consideration here again centers on whether or not the lavatory user will be in a wheelchair. If not, and standing is possible, then the typical vanity cabinet arrangement is usually preferred due to the benefit of storage, countertop space and stability. When the lavatory user must access from a wheelchair, this often involves rolling under the sink to get close enough for shaving/washing/teeth brushing, etc., and in such cases, vanity cabinets are often an impediment.
When the vanity cabinet is eliminated, the most common type of lavatory in residential bathrooms is the pedestal sink which permits a wheelchair user to slide under the sink bowl another 10” or so which provides enough access for many users.

Pedestals sinks, however, can create a problem for wheelchair users particularly when leg extensions are needed. Such users may hit the pedestal which in turn can “cock” the lavatory, leading to damage. Although pedestal sinks are wall mounted, they can be shifted when enough force is applied to the pedestal. When a user is trying to maximize the amount of clearance under a sink, the wall mounted lavatory is the preferred option, some of which can be quite deep (from front to back) and wide as well. There are additional adaptions possible with fabricated wall mounted counter tops that can add space for the user without requiring any floor support.


Other Bathroom Accessibility Considerations
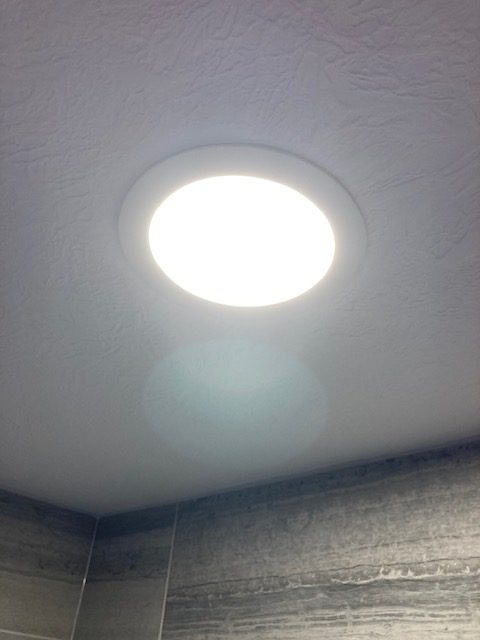
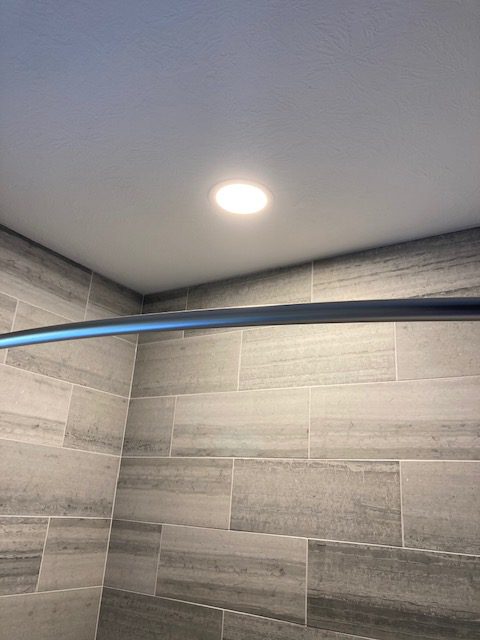
Lighting is an area often in need of attention, especially in older residential bathrooms. Often the lighting is especially inadequate in the tub shower areas with bathrooms having one dim overhead light and perhaps a vanity light. When the shower curtain is closed (or even a shower door with obscure glass), lighting in the shower area is dim. This is generally easily corrected with and inexpensive LED light approved for use in shower areas.
Flooring is often an issue with remodeled bathrooms especially when tubs are converted to showers and/or vanity cabinets are removed for pedestal or wall hung sinks. It is also an issue with door widening projects as mentioned above. While multiple types of flooring can work well in bathrooms (tile, sheet vinyl, vinyl plank, etc.), it is helpful to bear in mind three flooring considerations in addition to appearance and price:
- Traction: is the flooring textured, so that it provides better “grip” for bare feet which helps in minimizing slips and falls? (Smooth, slick flooring may look nice, but when wet, it is hazardous, especially when wet!)
- Will the flooring hold up to water? This is especially important with zero threshold showers and wheelchair users who may dry off outside of the shower, meaning that water will be dropping on the flooring. (It’s going to get wet, and sometimes very wet!)
- Transitions: as mentioned above, minimizing flooring elevation changes is very important so avoid trip hazards for all users but especially those in walkers. Elevation changes about 3/8” are often uncomfortable for wheelchair users. Elevation changes can be minimized with the selection of flooring materials and also a well shaped and installed transition strip from flooring types adjacent to the bathroom door.
Ingress/Egress
(Ramps and thresholds)
Getting in and out of home safely and effectively is an essential part of daily life for most of us. For those dependent upon wheelchairs, walkers or with related mobility challenges, special consideration must be given to getting to and through entry/exit doors in homes.
Wheelchair Ramps
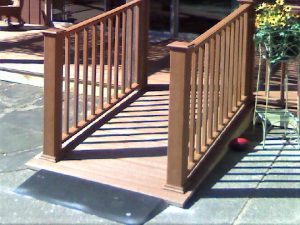
Wheelchair ramps have become more common in recent years, yet many unsafe ramps continue to be constructed. What makes a ramp safe or unsafe? There are several factors to consider, but a major issue is generally ramp slope. Simply put, a ramp that has too great a slope is unsafe and could result in very serious injury to ramp users. The acceptable MAXIMUM slope is no greater than 1” of rise (change in height) for 1’ of run (horizontal distance). This means that for a 12” (inch) rise, a wheelchair ramp should be at least 12’ (feet) long.
Additionally it is important to note that level landings are highly recommended at any doorway entrance, and anytime a ramp changes direction. These landings are typically 5’x5’ (60”x60”) to accommodate a full wheelchair rotation with leg extensions in use. Minimum width of a ramp is typically 36” from side to side, inside the handrails.
It is also important to consider the transition from the ramp surface to the sidewalk, drive, floor, door threshold or whatever is at the end of the ramp. Bumps and jumps should be minimized to ensure the wheelchair user’s safety and comfort. Therefore it is recommended that any elevation change be less than ½” from edge of ramp to surface of transition.
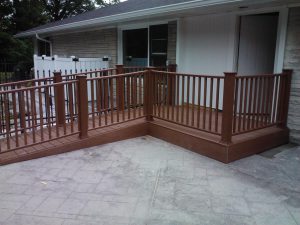
Wheelchair ramps can be constructed out of different materials, including treated lumber, composite decking material and concrete. It is important to consider, especially with a concrete ramp, how to integrate handrails. (See photos for examples)


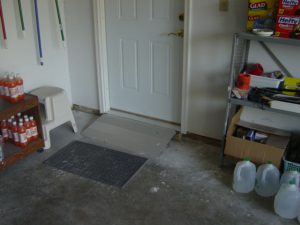
Transition Ramps
Transition ramps are used for smaller changes in elevation, generally 3” or less and are typically at a greater slope than wheelchair ramps. The reason greater (steeper) slope is permitted is that transition ramps are short enough that at least one set of wheelchair wheels can be on a flat surface while the other set is on the slope. Transition ramps are commonly rubber or aluminum and can be a relatively convenient and inexpensive solution to smaller elevation changes. Additionally, transition ramps do not typically require handrails, though for the very unsteady, handrails may still be advisable.